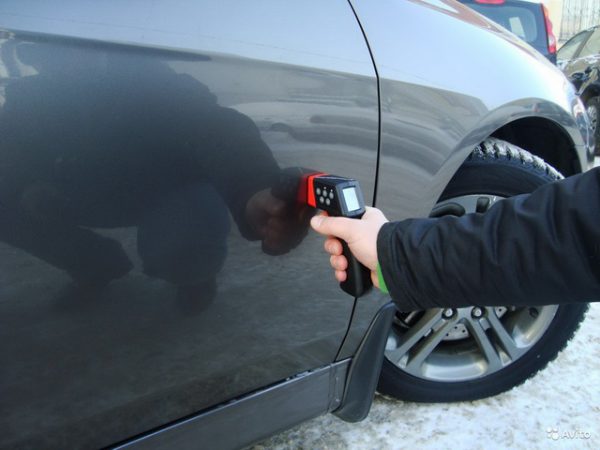
To buy a good used car, you need to try - a huge number of such cars are broken, poorly painted. It is not safe to buy cars with a painted body, because there is always a risk of detecting hidden defects. The paint thickness on a car is easily measured using a special device - a thickness gauge, so that problems can be identified even at the purchase stage.
- Measurement of the thickness of the paintwork - why is it carried out
- Factory Paint Performance
- Determination of paint thickness by car brands
- Classification of thickness gauges
- Electromagnetic thickness gauges
- Eddy Current Thickness Gauges
- Capacitive Thickness Gauges
- Ultrasonic Thickness Gauges
- Instrument selection
- Proper use of a thickness gauge
- Prioritization of certain parts
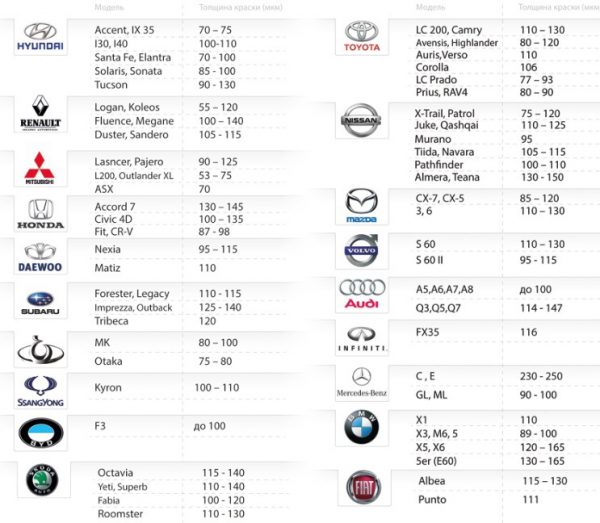
- LPC thickness table
- Differences in car service painting
- Tips & Tricks

Measurement of the thickness of the paintwork - why is it carried out
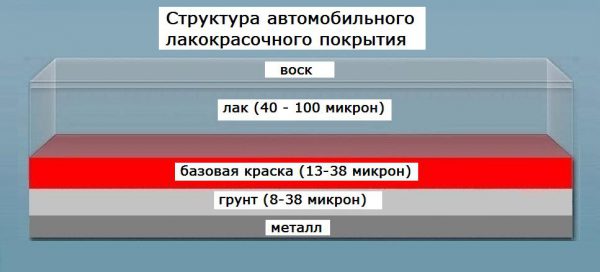
The thickness of the paint layer on car parts is an indicator that reflects the distance from the surface of the body to the actual metal base. Paintwork (LCP) can be measured in millimeters (mm), but on most modern machines it is so thin that it is measured in microns, they are micrometers (microns). One micron is 0.001 mm. Even such a small layer is enough to protect the car from water, dirt and oxygen.
This value is set in the factory depending on the vehicle model, but in accordance with accepted standards. There is no common standard, and thickness can vary widely. It will depend not only on the wishes of the manufacturer, but also on such factors:
- mode, drying temperature;
- staining method;
- number of layers of paint;
- brand of paint.
Why do we need paint thickness measurements on a car? Coverage from the factory is very different from what they do in most car services. Perfect staining is an expensive option, because craftsmen save on paint. A weld seam can hide under its layer if the machine is a “constructor”. Putty, paint often cover rot, holes, pits on the old technique. All this reveals special measurements. Also, using the meter, the following data can be checked:
- degree of wear of the machine;
- body repair in the past;
- the presence of polished scratches;
- places of thickening of the paint during rough repairs;
- Polishing too frequent.
Since it is almost impossible to achieve factory parameters under normal conditions, all deviations are easy to identify, which will allow you to refuse to buy or demand a serious discount.
to contents ↑Factory Paint Performance
Factory paint gives protection to the metal base of the body, as well as to the other layers that are applied to it - galvanization, primer. Only strict adherence to technology provides the desired durability of the body. How much will the total thickness of the coating made at the plant be? For most cars, the indicator is in the range of 70-180 microns, while the spread in the car can be 20-25 microns, for one part - 10-15 microns. For the following elements, a layer thickness of 50-90 μm is allowed:
- door racks;
- thresholds;
- trunk;
- engine compartment.
It is impossible to paint the machine without the specified error even at the factory. The paint and varnish product can be unevenly distributed in different areas: for example, in horizontal zones the layer will inevitably be thicker than in vertical ones. Also during staining, shagreen leather appears - surface roughness. The coloring indicators for parts made of non-ferrous and ferrous metals also differ. Thus, even on a new car, a spread of readings is allowed when measuring with a device.
to contents ↑Determination of paint thickness by car brands
If the machine was repaired, putty was applied to the parts, then the thickness of the coating layer will increase to 180-200 microns or more. Check for such deviations with a special device for measuring paint - thickness gauge. Such devices make it possible to measure with high accuracy the layer of paintwork on metal, plastic, and glass products.
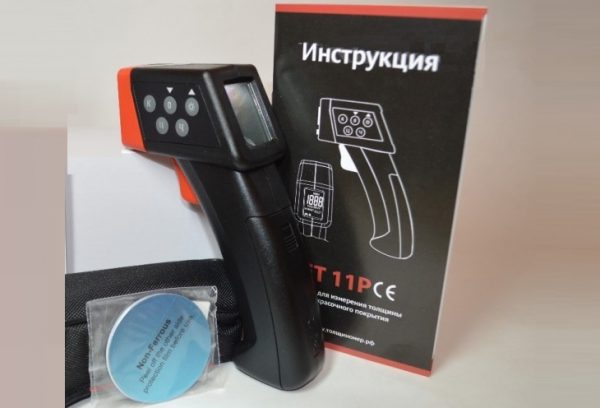
to contents ↑Modern thickness gauges do not harm the coating of the car, do not violate its integrity. Inexpensive models help determine only the presence of putty, more upscale products provide information about even the slightest repainting of the body. The principle of operation of any thickness gauge is the calculation of the interval from the sensor to the base.
Classification of thickness gauges
You can measure the thickness of the paint with different instruments, there are several basic ones that differ in the way they are measured.
Electromagnetic thickness gauges
Such devices are used only for measuring paint on metal parts. They will not help in assessing the condition of plastic elements, non-ferrous metal products. For work, magnetic induction and the Hall effect are used, all calculations are done based on the density of the magnetic field. This field is created by a soft ferromagnetic rod with a coil. The permissible error percentage is 3%.
to contents ↑Eddy Current Thickness Gauges
An electric current is generated on the surface of the probe of such a device, which passes through a coil with wound wire. As a result, an alternating magnetic field is created. When the probe is approached to a conductive surface (metal), Foucault currents (eddy currents) are formed, with the help of which the necessary data are obtained. Such devices are suitable for parts made of aluminum and other non-ferrous metals. The price of the devices is quite high - about 5 thousand rubles.
to contents ↑Capacitive Thickness Gauges
These measuring instruments are suitable for conductive non-magnetic products. The sensor itself serves as the first lining of the capacitor, the second will become the body. Between them is a dielectric - a layer of paint, the capacity of which will be measured by the device. But such thickness gauges have significant disadvantages - they are very sensitive to moisture, and their contact surface is large.
Ultrasonic Thickness Gauges
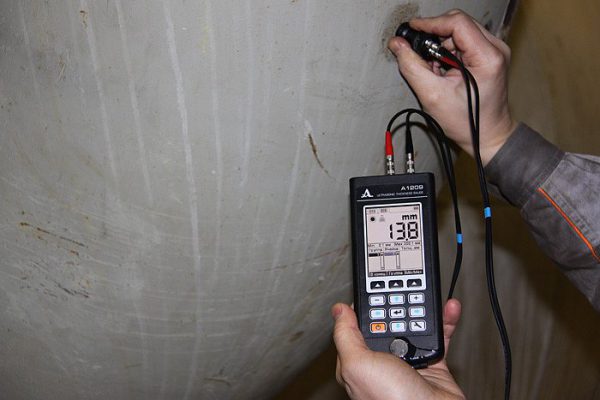
Such thickness gauges work with parts from any material - metal, plastic, composites, ceramics, glass, so the user will have the opportunity to measure the thickness of the layer on all the basic and decorative details. The instrument probe has an ultrasonic sensor that sends pulses through the coating. After reflection of the pulse from the surface, it is transformed into an electrical signal. The result is instant - in a second, the desired numbers will be visible on the screen. One minus is a very high price (from 10 thousand rubles).
to contents ↑Instrument selection
When choosing a device, it is important to understand what it is planned to measure, for what purposes, how often it will be used.If the thickness gauge is bought by a professional, it is better to pay attention to ultrasonic models. Masters may be interested in additional functions - an extended temperature range, a long battery life, backlighting, the ability to connect to a computer, and loading results into memory.
Those who decide to buy a device for household needs should consider less expensive options. These are electromagnetic and vortex thickness gauges. The quality of measurements will be at a decent level, the user will be able to establish the fact of repair work and the exact details of their implementation.
What else should I consider when buying? Here are additional thickness gauge parameters:
- Battery capacity;
- launch by pressing the trigger or button;
- display size.
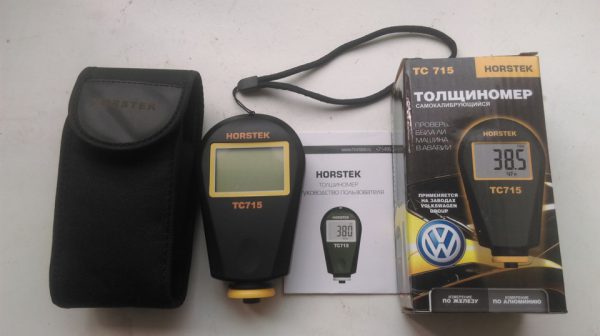
The most popular brands of devices are ET, CHY Firemate Company, Horstek, PHYNIX.
to contents ↑Proper use of a thickness gauge
Before starting work, check whether the battery is sufficiently charged (it is necessary that the charge level is at least 60-70%). Otherwise, the metering may be incorrect. The measurement surface must be cleaned of visible dirt, grease, and other stains.
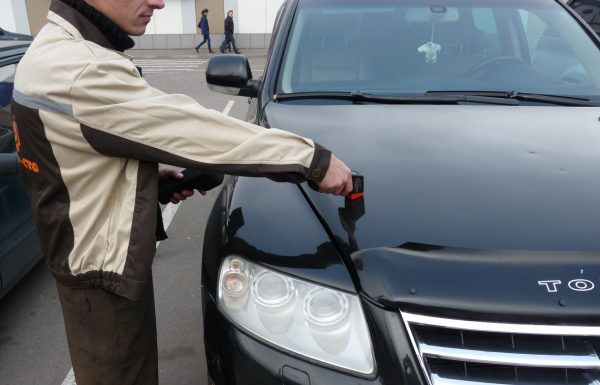
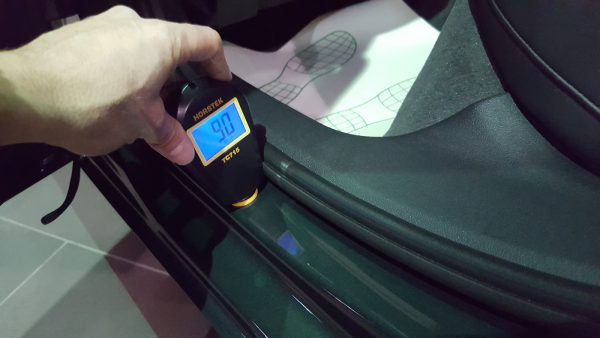
How to check the thickness of the paint? Work with the device is very simple. It needs to be started (turned on), after activating the display, attach a sensitive element to the target area. Usually choose the dubious, which even outwardly seems suspicious. In other cases, the device should be attached to any point on each part of the vehicle.
It is best to use the "square-nested" method. To do this, the body is mentally divided into squares with sides of 25-35 cm, then check each square in 1-2 places. The method is painstaking, it will take up to 1-2 hours, but it is very reliable. If you need to act quickly, use a different method. On each detail, a cross is mentally drawn, then measurements are taken at its extreme points and in the center. In each place you should hold the device for a few seconds - as written in the instructions for the thickness gauge. After reflecting the data, they are reset or fixed, a new measurement is carried out.
to contents ↑Prioritization of certain parts
Experts advise starting the test from the roof. It is rarely painted, since this element of the machine is almost not involved in accidents. The LPC layer here will become the standard - it can be used to determine what thickness should be in other places of the body. Factory performance in other areas is always a little more, as provided by technology (but not by much).
Further, the verification procedure will be as follows:
- racks;
- front and rear bumpers;
- body thresholds;
- the door.
to contents ↑It is also worth checking the interior, trunk, a place under the hood, a gas tank flap. Suspicious zones are measured several times - in the center and periphery. Differences of more than 35-55 microns are considered a defect, this is not a factory paint.
LPC thickness table
There is data according to which it is possible to quickly detect deviations in the thickness of the coating layer. Below is a table with information on major car brands:
| Car make | Paint thickness, microns |
| Audi series A | 80-100 |
| Audi Q series | 110-165 |
| BMW | 90-110 |
| Cadillac Escalade, CTS | 120-150 |
| Chery | 100-120 |
| Citroen | 75-125 |
| Citroen DS4 | 205-230 |
| Daewoo | 90-120 |
| Fiat | 100-140 |
| Ford | 115-145 |
| Hyundai | 70-130 |
| Honda | 80-130 |
| KIA | 100-140 |
| Lexus | 140-150 |
| Mazda | 85-130 |
| Mercedes | 165-180 |
| Mitsubishi Lancer, Pajero | 90-125 |
| Mitsubishi L200, Outlander XL, ASX | 55-75 |
| Nissan | 80-120 |
| Nissan Almera, Teana | 130-150 |
| Opel | 110-160 |
| Peugeot | 100-20 |
| Renault | 100-140 |
| Subaru | 100-140 |
| Toyota LC200, Camry, Highlander, Auris, Vers | 110-130 |
| Toyota Avensis, Corolla, Prado, Prius, RAV4 | 80-110 |
| Volkswagen | 110-140 |
| Lada Kalina, Priora | 60-100 |
| Lada Grant, Niva | 110-140 |
| Lada Largus | 180-230 |
Differences in car service painting
Exactly the same type of coverage as the factory one, no ordinary car service can perform. Paint always lays in a thicker layer than it was at the beginning. But professionals do the job efficiently, so the paintwork has minor and completely acceptable deviations. If the layer thickness is more than 40-100 microns than it should be, then putty was used during the repair. According to the masters, a coating with a deviation of up to 55 microns can be left unchanged, it provides sufficient protection against corrosion. If the indicators are exceeded by more than 100 microns, the elasticity of the paintwork and the resistance to vibration will be an order of magnitude lower. Over time, the paint will necessarily peel off.
to contents ↑
Tips & Tricks
What conclusions can be drawn when receiving data after measurements? When the thickness of the paint layer on the wings of a car is 100, on the hood 140, on the doors 120, you should not be scared. Such deviations are quite acceptable and are often observed even on a new machine. But a spread of 50-80% or more indicates that the car was painted, which means that it was in an accident. In this case, it is necessary to conduct a more detailed analysis at the service station, having paid for the diagnosis. This will help to avoid serious problems and costs in the future.

