Putty is used to level the walls. However, even very carefully putty is not possible to obtain a perfectly smooth surface. In any case, traces of a spatula, irregularities in the transitions and other minor defects will be visible on the wall. Sanding the walls after puttying helps to solve the problem of fine-tuning the surface. This article will discuss the nuances of grinding the surface, as well as the tool necessary for its implementation.
- Set of tools
- Tips for choosing an abrasive
- Homemade tool
- Wall Sanding Instructions
- Ceiling Grinding
- Dust protection

Set of tools
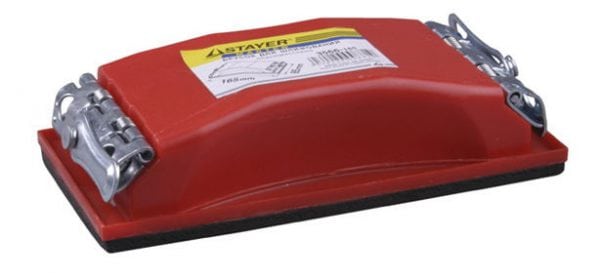
Before you start grinding the surface, you need to decide on the tool used. Work can be done manually or with a grinder. As an abrasive, you can choose a grid for puttying or sandpaper.
The abrasive mesh for puttying has a perforated surface, so that all dust peeling off the coating will go through the holes. As a result, using an abrasive mesh is more convenient than sandpaper, as it does not clog so much. Nevertheless, in the process of work, most likely, you will have to change the worn mesh to a new abrasive. The degree of deterioration can be determined by the appearance of the mesh: if it breaks or the grinding efficiency deteriorates, then the device must be replaced.
Trowel nets are sold cut in pieces - just under the grinding bar. Another thing is that the bars themselves come in a variety of sizes, so when buying a mesh you need to choose a product that fits under the bar. The drawback of the mesh is its price, which is higher than sandpaper.
The advantage of sandpaper is its cheapness. The shortcoming is fragility - it wears out quickly. Emery is sold in the finished version (in pieces) or in rolls (of different sizes). Paper cut under a bar will cost more, but this price is justified by saving time, since the rolls still need to be cut into sheets of suitable size. When cutting, it is recommended to provide allowances on the bars under the clamps.
Note! Despite the fact that the abrasive mesh is more expensive, working with it is simpler and faster than with sandpaper.
So, what to sand the walls after puttying, - decided. You will also need the following additional tools and accessories:
- step ladder;
- carrying lamp;
- skin skater;
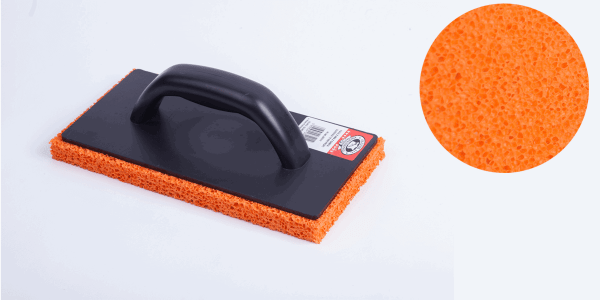
- grinding sponge;
- putty knife.
Advice! When grinding surfaces in the air there is a lot of dust. Therefore, it is recommended that you use all the necessary protective equipment, including a respirator, gloves, glasses and a hat.
Thinking about the issue of how to putty putty, one should proceed from the scope of the task:
- For surfaces that are small in area, it is quite possible to do with the manual method of processing with the help of a bar.
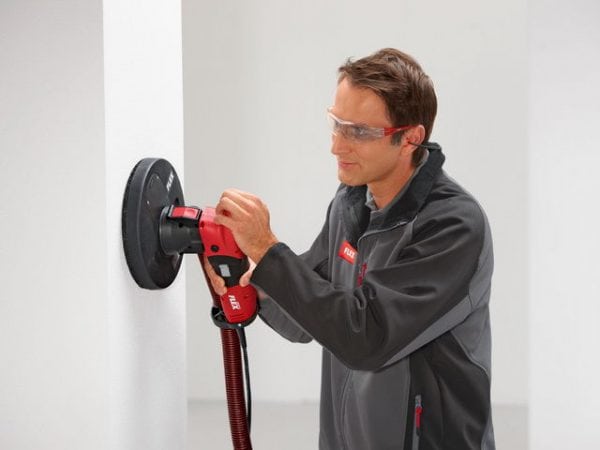
- Grinding large areas is much simpler and faster if you use a surface grinder (however, you still have to finish the corners manually).
- For large areas with complex terrain, an eccentric sander of high power is the best choice.
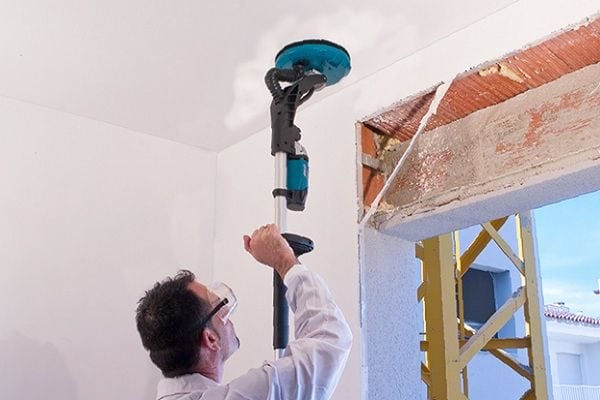
Many models of grinders are characterized by modern ergonomics, so that when working with them hands are not so tired.The most advanced models are equipped with telescopic levers, which allows you to reach even inaccessible sections of walls or ceilings.
to contents ↑Tips for choosing an abrasive
If the surface is already covered with finishing materials, starting grinding is carried out with coats with large grains, and finishing sanding with fine-grained abrasives. Sandpaper is classified according to grain size.
Each type of sandpaper according to FEPA standards corresponds to a specific number:
- macro-sizes - from No. 20 to No. 240;
- micro-sizes - from No. 240 to T2500.
For initial grinding, skins with numbers ranging from 120 to 180 (i.e., coarse grains) are used. The smaller the number, the greater the bumps can be eliminated with an abrasive. To remove obvious defects, No. 60 is often used, for processing a wall for wallpaper - from No. 100 to No. 120, for painting - from No. 120 to No. 150.
Based on the above standards, the question of how to sand the finishing putty does not occur by itself - it should be an abrasive with fine grains - from No. 240 to No. 280. For delicate alignment, the use of smaller grains is also allowed.
to contents ↑Homemade tool
Sanding putty in hard-to-reach areas (corners, joints, niches) can be done using a homemade device. We take a piece of the plastic L-shaped profile and cut it so that we get a smooth plastic strip with a width of about 7-8 centimeters. On the back side, glue the sandpaper, and then divide the strip into segments of 18-20 centimeters. At the same time, we trim the corners so that the device is shaped like a pencil.
Advice! If desired, you can equip the tool with abrasives of different grain sizes.
to contents ↑Wall Sanding Instructions
Putty sanding is carried out in the following order:
- We inspect the putty surface for voids. You must also make sure that the coating is completely dry.
- We put on a respirator, goggles, gloves and a hat.
- We install lighting, since the entire surface should be clearly visible. You can connect a portable lamp.
- If noticeable tubercles remain on the surface, carefully remove them with a spatula.
- Do not immediately take on the finishing surface if grinding is performed for the first time. It is recommended that you first practice on a small area. For training, normal abrasives or sandpaper are suitable.
- The required level of grinding quality is dictated by the tasks set. If the wall is preparing for wallpapering, you can ignore small scratches or similar defects. However, if the surface is to be painted, the wall should be perfectly even.
- After choosing a suitable skin and test grinding, you can proceed to the initial surface treatment. We begin sanding from the top of the wall. We gradually go down, moving from one small area (about 1 square meter each) to another. The nature of the movements should be of the same type: for example, "up and down", "in a circle", "right-left." Avoid too tight pressure or prolonged grinding of the same place, as this can lead to roughness. If, nevertheless, such defects are allowed, we continue grinding, and at the end of this process we fill the appeared troughs.
- When most of the surface has already been sanded, you can do the corners and other hard-to-reach spots. It is best to handle such remote areas with special skins with beveled corners. You can choose a more traditional material - bent sandpaper.
- Upon completion of the work, we remove all the accumulated garbage, and also carry out wet cleaning in the room.
- Again we check the surface for defects.If everything is in order, you can begin to finish grinding.
- Finishing is performed using fine-grained abrasive. At the same time, the movements of the hands should be smoother than with starting grinding. Movements should be tangent, but not pressing. At the finish stage, it is especially important to have good surface lighting.
- Again we remove the appeared garbage, and we process the walls with a primer. The work is done, you can start decorating the wall with decorative material.
The picture shows the correct trajectories of the hands:

Ceiling Grinding
About how to sand the wall after puttying, was described above. Now briefly dwell on the features of grinding the ceiling.
The ceiling attracts no less attention than the walls - any defect on the surface will be striking. From a technological point of view, the process of processing the ceiling is no different from polishing walls, but such work is characterized by much greater complexity. Manually grinding the ceiling is physically difficult, so it is better to use a grinder.
We put an abrasive mesh on the grinder. For starting grinding, numbers from 60 to 80 are suitable, and for finishing - No. 100. To work with the ceiling surface you will need a reliably standing table or step ladder. However, if a telescopic pole tool is available, the ceiling can be sanded and standing on the floor. The nature of the movements during the processing of the ceiling is circular.
The first run removes large defects. Then we remove dust and construction debris, check the surface for small flaws. If any, correct them with a spatula. Next, proceed to finishing sanding with a fine-grained skin.
to contents ↑Dust protection
The process of skinning is accompanied by significant dust formation. Small dust particles penetrate even through cracks in closed doors and are carried far beyond the working room. Therefore, even before the start of repair work, it is recommended to purchase a protective film for furniture (polyethylene) and cover with it all valuable household items. At the same time, if possible, all furniture and household appliances should be removed from the working room altogether. Windows should also be covered with foil. Fastens the film around the perimeter with tape. Slots in the door frame can be plugged with wet towels - they will actively absorb dust.
Surface sanding is not a difficult job. The process requires not so much some special skills, but rather accuracy and attention to business.

